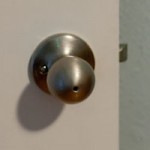
 A month or two ago, I finished up a pale blue and chocolate (trim) painting of my bedroom. I also replaced all of the 2-prong (but internally grounded) outlets with 3-prong outlets and replaced the window handles and lock. I was really enjoying my work and detail. I got to the door part of the project and thought,
Gee, before I paint this, let me make this cheap hollow luan-sheeted door better with a new doorknob and door stop.
I’ll see if I can fill it with insulating foam, too, for sound-deadening.
Also, it’s sticking at the door-jamb between the hinges and messing up the previous paint, so I’ll fix that somehow too.
See, new solid wood doors cost $320 or so from Lowes, and this house isn’t in a neighborhood where such investment would be returned at resale.
The door stop was $3 and took 20 seconds to replace. While at Lowes, I picked up a new door knob set.
I removed the old door, stripped it of its hinges and doorknob, and proceeded to drill 8 3/8″ holes into each of its 2 long edges for spray insulating foam injection. Six cans of foam, some clean up with razor and sandpaper, and 24 hours later, the inner side of the door and edges were ready to paint chocolate. Painted out in the sun, laid on makeshift saw-horses, I noticed a bit of a bow developing in the door, but shrugged it off. An hour later, my mother called to see what I was up to that fine Saturday. I mentioned the bowing of the door.
“Is it out in the sun?”
“Yes”
“That’ll do it.”
Knowing there wasn’t really anything I could do about it now, I decided I’d just have to see how things settled after drying and test fitting.
After several days of being re-hinged and mounted, the door was still pinching at the door jamb about 6 inches from being fully closed.
Door removal, two Dremel sessions with a sanding drum later, and another separate sanding of the door edge surface to remove ~1mm, the door edge and jamb trim were finely honed to allow the door to close all the way. I even shimmed under the hinges in strategic spots to perfectly center the door within the trim to allow as much room for paint as possible.
I repainted any sanded surfaces with chocolate, then, 2 weeks later, I motivated myself to finally get the paint and paint the outer surface of the door white to match the hallway.
You’re not going to win, door.
Having never installed a doorknob before, I read the instructions. Turns out the semi-old doorknob was through a very rough 2 1/32″ hole in the door and 2 1/8″ is the standard. I decided I’d have to drill a new hole. It also turns out the old bolt receiving plate was at least an inch longer (its mating surface with the door jamb) than the new one, so I’d have some wood filling to do.
How am I going to drill this new 2 1/8″ hole when there’s no material for the centering bit in this hole saw to grab? This saw is just going to jump all over the place and chew the hell out of the door everywhere but where I want.
After, indeed, chewing the hell out of the doorknob area, I went to Lowes ready to pick up a new door slab/blank to start over with. In the door aisle, I barely happened across a slick little door lock installation kit which has a guide you mount to the door for receiving the hole saw. Another I-don’t-even-remember-anymore dollars later, I was at home with the kit and not a new door. I mounted the guide to the door and drilled a nice clean hole. The area around the hole that was chewed up would have to get some wood filler, sanding, and repainting.
Min-Wax Performance Wood Filler to the rescue.

I filled in the entire receiving plate area and filled in the chewed area around the doorknob hole. Though the directions call for only 30 minutes of dry time before sanding, I gave the filler a day to dry then sanded. With some careful marking, Dremel, chisel, and paint work, everything got finished up.
Nice save. I like how you were determined not to let the door win. Having that attitude sometimes triggers something in your brain to be inventive.
I had a similar situation a few years ago with a hole saw. Stupidly, I used the wrong size (fortunately smaller)! What saved me was the scrap of plywood I was using to test hole sizes before drilling into the real piece. I centered the hole from the next size up over the smaller hole, clamped it in place and re-drilled  a nice clean hole.
The first thing to consider in home renovation is the safety. What door handle or door knob are you using?Â